Final Steps
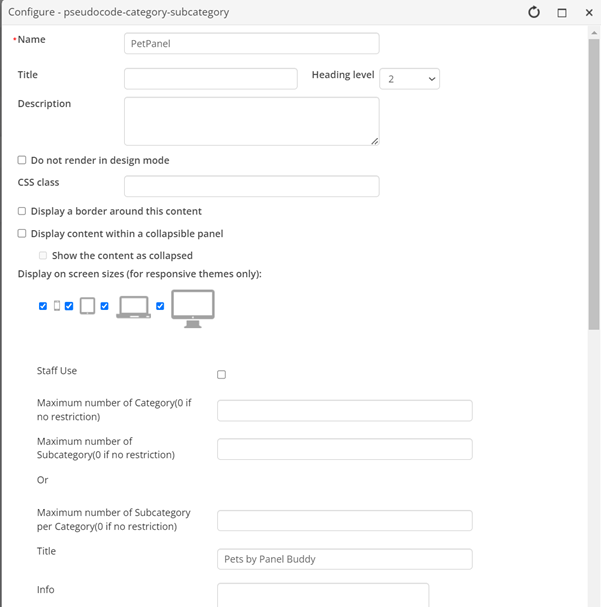
1. Name – As with all iParts it is recommended to give the iPart a useful name. No spaces, no special characters.
2. Title – the standard title here does not need to be populated.
3. Staff Use – only check this if the Panel will only be used on the staff site
4. Maximum number of categories/subcategories. If you wish to control the number of selections that can be made, populate the maximum number of values. If empty or set to 0 then no limits will be enforced.
5. Title – this tile will appear within the iPart frame on the page
6. Info – A text field to provide information to the user
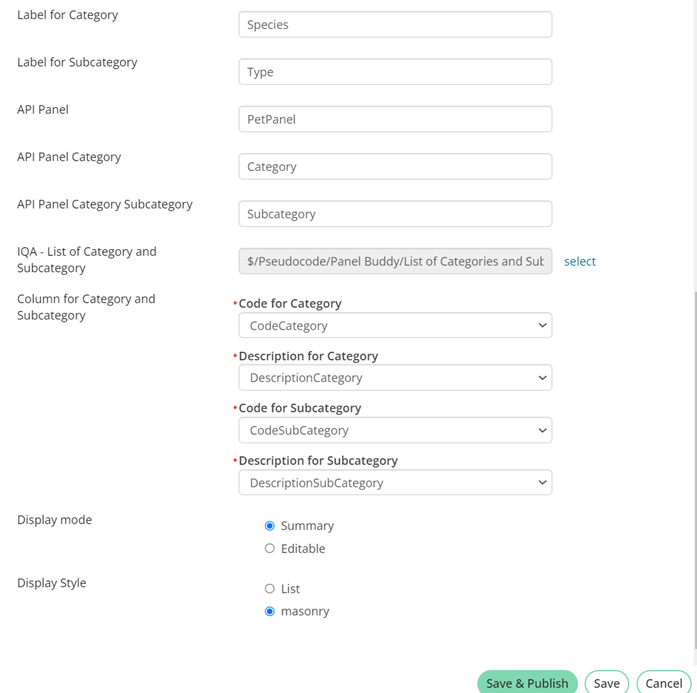
7. Label for the Category – user-friendly description.
8. Label for the Subcategory – user-friendly description.
9. API Panel – This is the name of the panel used to save the data to the record.
10. API Panel Category – the field within the panel used to save the category.
11. API Panel Subcategory – the field within the panel used to save the subcategory.
12. IQA List of Category and subcategory – select the IQA query used to display the selection options (standalone panel )
13. Column names for the four fields – use the aliases if populated
14. Display Mode - We recommend using Panel Buddy in Summary mode to avoid inadvertent changes to data.
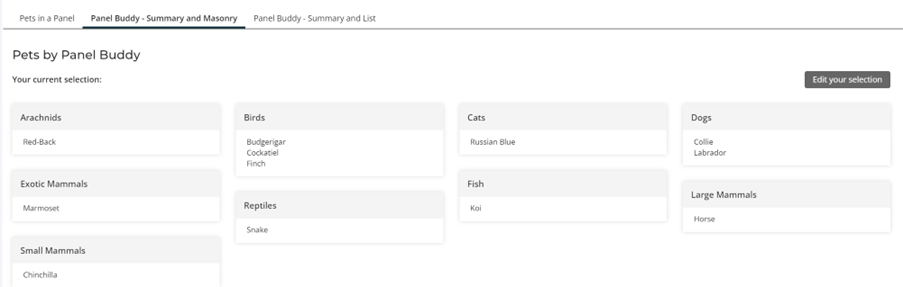
This is the Summary and Masonry View showing users their selections with an option to edit. The masonry option automatically maximises the use of the real estate available on the page
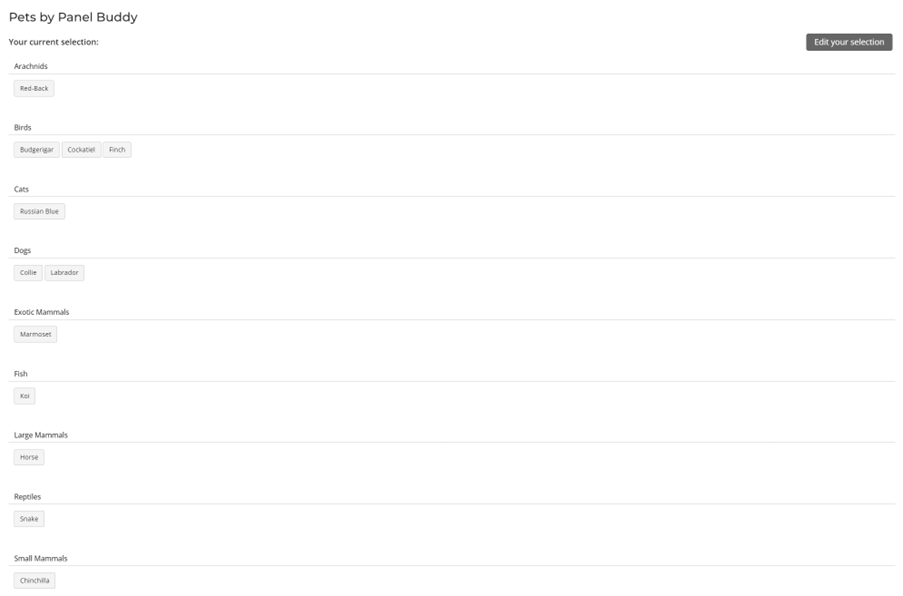
This is the Summary and List view of the same selections on the same record.